marko krstić

menu
jQuery(document).ready(function($){

   $(window).on('resize', function(){

            if ($(window).width() >= 1000 && $(window).width() <=1400) {

                $('#card_2').appendTo('#card-column-1');
                $('#card_3').appendTo('#card-column-1');
                $('#card_4').appendTo('#card-column-2');
                $('#card_5').appendTo('#card-column-2');
                $('#card_6').appendTo('#card-column-2');

            }


            else if($(window).width()> 1400) {

                $('#card_2').appendTo('#card-column-2');
                $('#card_3').appendTo('#card-column-2');
                $('#card_4').appendTo('#card-column-3');
                $('#card_5').appendTo('#card-column-3');
                $('#card_6').appendTo('#card-column-3');

            }


            else if($(window).width()< 1000) {

                $('#card_2').appendTo('#card-column-1');
                $('#card_3').appendTo('#card-column-1');
                $('#card_4').appendTo('#card-column-1');
                $('#card_5').appendTo('#card-column-1');
                $('#card_6').appendTo('#card-column-1');

            }
        });


    // Invoke the resize event immediately
    }).resize();

});
jQuery(document).ready(function($){
// Bind to the resize event of the window object
$(window).on("resize", function () {
var container = $( `#div_block-21-2` ).width();
var docWidth = $( window ).width();
var final = docWidth - ((docWidth - container) / 2);
$('#hero-lines').css('width', final + 'px');
// Invoke the resize event immediately
}).resize();
});
This is for GreenSock
function init() {
  gsap.from("h1", {autoAlpha:0, stagger:0.5})
}

window.addEventListener("load", init)
h1 {
visibility:hidden;
}(function ($) {
$(".wrap").each(function () {
$(".item", this).prepend(function (i) {
return $("<span />", { text: i + 1 });
});
});
})(jQuery);$(window).scroll(function(){
if ($(this).scrollTop() > 100) {
$('.element').addClass('active');
} else {
$('.element').removeClass('active');
}
});Change element class or ID on lines 3 and 5 to trigger right elements and on line 2 100 is how many pixels to scroll until class is added.
If you need to rotate logo while you are scrolling the page like on Matthias Altmann's website here is the code he shared with us
(function($) {
	$(document).ready(function(){
		$(window).scroll(function() {
		var deg = $(window).scrollTop()/2;
		$('#header-company-logo').css({ transform: 'rotate(' + deg + 'deg)' });
		});
	});
})(jQuery);
Example: https://www.altmann.de/
Add this to your functions.php and replace CPT_slug and taxonomy_slug
<? php

/*============================================
=            Manage Admin Columns            =
============================================*/
add_filter( 'manage_taxonomies_for_{CPT_slug}_columns', 'docs_columns' );
function docs_columns( $taxonomies ) {
    $taxonomies[] = '{taxonomy_slug}';
    return $taxonomies;
}
Red is added added column

If you need to have a parent option for any post custom post to organize inside the admin menu or to loop all child post for some post id just add this code snippet to functions.php

<?php

add_filter( 'register_post_type_args', 'add_hierarchy_support', 10, 2 );
function add_hierarchy_support( $args, $post_type ){

    if ($post_type === 'post' || $post_type === 'docs') { // <-- enter desired post type here

        $args['hierarchical'] = true;
        $args['supports'] = array_merge($args['supports'], array ('page-attributes') );
    }

    return $args;
}
<?php
$data = array(
'post_type' => array( 'post' ),
'post__not_in' => array(get_the_ID())
);
echo build_query( $data );
?>Paste this into code block to get that data. Paste that data into Query of Easy posts or Repeater. With this, you can put in query data from ACF Pro as well

Credits to: https://wpdevdesign.com/how-to-generate-the-query-string-for-easy-posts-in-oxygen/
<?php
	global $query_string; // required
	$posts = query_posts($query_string."&orderby=title&order=ASC");
?>
Place it above Repeater or East Posts
/*==========================================
=            Reverce loop order            =
==========================================*/

function alter_order_of_posts( $query ) {
    if ( $query->is_main_query() ) {
        $query->set( 'order', 'ASC' );
        $query->set( 'orderby', 'menu_order' );
    }
}
add_action( 'pre_get_posts', 'alter_order_of_posts' );
// set current category
$categories = get_the_category();
$category = $categories[0];
$cat_ID = $category->cat_ID;
// get next post link
$next_post = get_adjacent_post( true, '', false );
if( $next_post ) {
echo '<a href="' . get_permalink( $next_post->ID ) . '">Next post</a>';
} else {
$first = new WP_Query( array(
'post_type' => 'project',
'post_status' => 'publish',
'posts_per_page' => 1,
'order' => 'ASC',
'cat' => $cat_ID
));
$first->the_post();
echo '<a href="' . get_permalink() . '">Next post</a>';
wp_reset_query();
};
// show prev post link
$prev_post = get_adjacent_post( true, '', true );
if( $prev_post ) {
echo '<a href="' . get_permalink( $prev_post->ID ) . '">Prev post</a>';
} else {
$last = new WP_Query( array(
'post_type' => 'project',
'post_status' => 'publish',
'posts_per_page' => 1,
'order' => 'DESC',
'cat' => $cat_ID
));
$last->the_post();
echo '<a href="' . get_permalink() . '">Prev post</a>';
wp_reset_query();
};This one is work in progress
<nav>
  <ul class="stepProgress">
    <li><a href="#1" >1</a></li>
    <li><a href="#2" >2</a></li>
    <li><a href="#3" >3</a></li>
    <li><a href="#4" >4</a></li>
  </ul>
</nav>
<div id="1"> Step 1 </div>
<div id="2"> Step 2 </div>
<div id="3"> Step 3 </div>
<div id="4"> Step 4 </div>
<div id="5"> Step 5 </div>div{
width:200px; height:200px;
border:2px solid grey;
text-align:center;
display:none;
}
div:target{
display:block;
}Example on JSFiddle
Add this in codeblock in single post template
<?php $prev = get_previous_post(); ?>

<a href="<?php echo get_permalink( $prev->ID ); ?>">

	<h3><?php echo apply_filters( 'the_title', $prev->post_title ); ?></h3>
	<?php echo get_the_post_thumbnail(
  		$prev->ID,
  		'thumbnail',
  		array('class' => 'your-class-name')
	); ?>

</a>


<?php $next = get_next_post(); ?>

<a href="<?php echo get_permalink( $next->ID ); ?>">
	<h3><?php echo apply_filters( 'the_title', $next->post_title ); ?></h3>
	<?php echo get_the_post_thumbnail(
  		$next->ID,
  		'thumbnail',
		array('class' => 'your-class-name')
	); ?>
</a>
Title is wrapped with h3 and thumbnail is having class ('your-class-name') that you can change to your needs.
Paste this into custom plugin's functions.php
function mytheme_custom_excerpt_length( $length ) {
    return 15;
}
add_filter( 'excerpt_length', 'mytheme_custom_excerpt_length', 999 );
return 15 means 15 words excerpt text being eclipsed. More on WordPress.org
This can be done easily with 1 line of CSS code and only-child selector:
.flickity-page-dots li:only-child{
	display: none;
}
.ct-image{
image-rendering: -webkit-optimize-contrast;
}Oxygen adding class to images by default ".ct-image". To target all the images use img tag or .ct-image.
If you want to play with more options there are some couple of more settings:
image-rendering: auto;
image-rendering: crisp-edges;
image-rendering: pixelated;

image-rendering: -moz-crisp-edges; /* Firefox */
image-rendering: -o-crisp-edges; /* Opera */
image-rendering: -webkit-optimize-contrast; /* Webkit (non-standard naming) */
image-rendering: crisp-edges;
-ms-interpolation-mode: nearest-neighbor; /* IE (non-standard property) */
By default, WordPress compresses your images for better performance.
Every time you upload a JPEG image in WordPress, it would automatically compress the image to 90% quality.
All you need to do is paste the following code in your custom plugin's functions.php
add_filter('jpeg_quality', function($arg){return 100;});When you do make these image quality changes, you want to make sure that you regenerate your thumbnails.
Code snippet taken from this source.
In this example, I have a hero slider ( ACF Pro repeater ) that is attached to all the pages and want to show slider only if at least one slide is created.
Note my repeater is "hero_slider". Yours can be different.

Set up slider with Oxygen repeater component and assign condition.


If you need to display only certain post type ( page, post, custom post) you need to add this to function.php
function searchfilter($query) {

    if ($query->is_search && !is_admin() ) {
        $query->set('post_type',array('post','page'));
    }

return $query;
}

add_filter('pre_get_posts','searchfilter')
On line 4 change what post type you need.

Resize image inside a container on one side to the edge of the page.
jQuery(document).ready(function($) {

// Hero Image scale and position
var adjust_size = function() {

	var newWindowWidth = $(window).width();
	if (newWindowWidth > 992){

		var winW = $(window).width();
		var conW = $(".container").width();

		var left = ((winW - conW) / 2 ) + 40;
		var size = ((conW / 3) * 2) + ((winW - conW) / 2) ;

		$(".hero-img").css("left", -left);
		$(".hero-img").css("width", size);
	}

  	else{

  		$(".var").css("left", "0px");

  	}

};
adjust_size();
$(window).resize(adjust_size);


// alert("Hello! I am an alert box!! 'winW'");

});max-width: unset !important;
position:relative;jQuery(document).ready(function($) {
var adjust_size = function() {
// Change code here
$('.content .right').width($(window).width() - 480);
// Change code here
};
adjust_size();
$(window).resize(adjust_size);
}); This code will help you to get values on page load and change them on resize. It can be useful to update the CSS values and objects position.
Code example with breakpoint
jQuery(document).ready(function($) {

// Footer fixed
var adjust_size = function() {

var newWindowWidth = $(window).width();
	if (newWindowWidth > 991) {
	    var footer = $(".footer").height();
		$(".main").css("margin-bottom", footer)
	}
	else
	{
		$(".main").css("margin-bottom", "0px")
	}
};
adjust_size();
$(window).resize(adjust_size);
// Footer fixed

});
<?php $terms = get_the_terms( $p->ID, 'product_cat' );
	foreach ($terms as $t) {
	echo $t->name, ' ';
} ?>
Product cat is category name for WooCommerce products category.
Thanks, Hammad Wali for sharing this useful code!
If it's just needed in one place, you could use the following:
<?php echo wp_strip_all_tags( get_the_excerpt( ) ); ?>Keep in mind, using the custom excerpt field will automatically remove all tags. Creating an excerpt automatically from the post content will not.
If you want more control, you can use wp_trim_excerpt() or wp_trim_words().
If you need more control to add something like this:
<?php echo wp_strip_all_tags( wp_trim_words( get_the_excerpt(), 60, '[...]' ) ); ?>wp_trim_words() allows you to pass in the text source, number of words, and the more text. You can remove the more text by setting this to false.
<h1>
  <?php echo single_cat_title( '', false );?>
</h1>
The result will be just Category name
Default is: Category: Category name
If you want to change "Category:" use this:
<h1>
  <?php echo single_cat_title( 'Some text: ', false );?>
</h1>
Thanks, Hammad Wali for sharing this useful code!
I was banging my head for 2 hours until I got help from Alexander Buzmakov.


after the file path add array, version and then print
<php
wp_enqueue_style( 'print_css', plugin_dir_url( __FILE__ ) . 'assets/css/print.css', array(), '1.0.0', 'print' );
An entire block stored in function.php should look like this.
You can always add it as @media print but with this you will have much more flexibility and load it where you need it.
<php
// Styles
function theme_styles() {
    wp_enqueue_style( 'print_css', plugin_dir_url( __FILE__ ) . 'assets/css/print.css', array(), '1.0.0', 'print' );
}

add_action( 'wp_enqueue_scripts', 'theme_styles',  1000, 1 ) ;
More about Print CSS:
https://www.sitepoint.com/css-printer-friendly-pages/
https://www.smashingmagazine.com/2018/05/print-stylesheets-in-2018/
Add this code to function.php to change excerpt length to 20 words
<?php
	add_filter( 'excerpt_length', function($length) {
    	return 20;
	} );
Place code bellow in your function.php
function wpdocs_excerpt_more( $more ) {
    return '<a href="'.get_the_permalink().'" rel="nofollow">Read More...</a>';
}
add_filter( 'excerpt_more', 'wpdocs_excerpt_more' );
This is custom code will loop 3 posts in same categories without a current post with random sorting.
<?php
$args = array(
                'category__in' => wp_get_post_categories( get_queried_object_id() ),
                'posts_per_page' => 3,
                'orderby'       => 'rand',
                'post__not_in' => array( get_queried_object_id() )
                );
    $the_query = new WP_Query( $args );

    if ( $the_query->have_posts() ) : ?>

        <ul class="">
        <!-- the loop -->
        <?php while ( $the_query->have_posts() ) : $the_query->the_post(); ?>

            <li>
                <h6>
                    <a href="<?php the_permalink(); ?>" title="<?php the_title_attribute(); ?>">
                    <?php the_title(); ?>
                    </a>
                </h6>
            </li>

        <?php endwhile; ?>
        <!-- end of the loop -->
        </ul>

        <?php wp_reset_postdata(); ?>

     <?php endif; ?>
In code block when you are using script add to PHP tab:
<?php
	wp_enqueue_script( 'magic-grid', '/wp-content/plugins/_NZP_Devs-Toolbox//node_modules/magic-grid/dist/magic-grid.min.js', '', '1.0.0', true );
?>
You need to put path from /wp-content/ and not just plugins folder


Note: Got this trick from a good friend Alexander Buzmakov.
Visit his tutorials oxywp.com.
var prevScrollpos = window.pageYOffset;
window.onscroll = function() {
var currentScrollPos = window.pageYOffset;
  if (prevScrollpos > currentScrollPos) {
    var element = document.getElementById("_header_row-335-8");
  	element.classList.add("mystyle");
  } else {
    var element = document.getElementById("_header_row-335-8");
  	element.classList.remove("mystyle");
  }
  prevScrollpos = currentScrollPos;
}
Put this code to functions.php
function deregister_styles(){
	wp_dequeue_style( 'oxygen-aos' );
	wp_deregister_style( 'oxygen-aos' );
}
add_action( 'wp_print_styles' , 'deregister_styles' );


function deregister_scripts(){
	wp_dequeue_script( 'oxygen-aos' );
	wp_deregister_script( 'oxygen-aos' );
}
add_action( 'wp_print_scripts' , 'deregister_scripts' );
The easiest way to find all registered scripts and styles is with the plugin MinQueue.

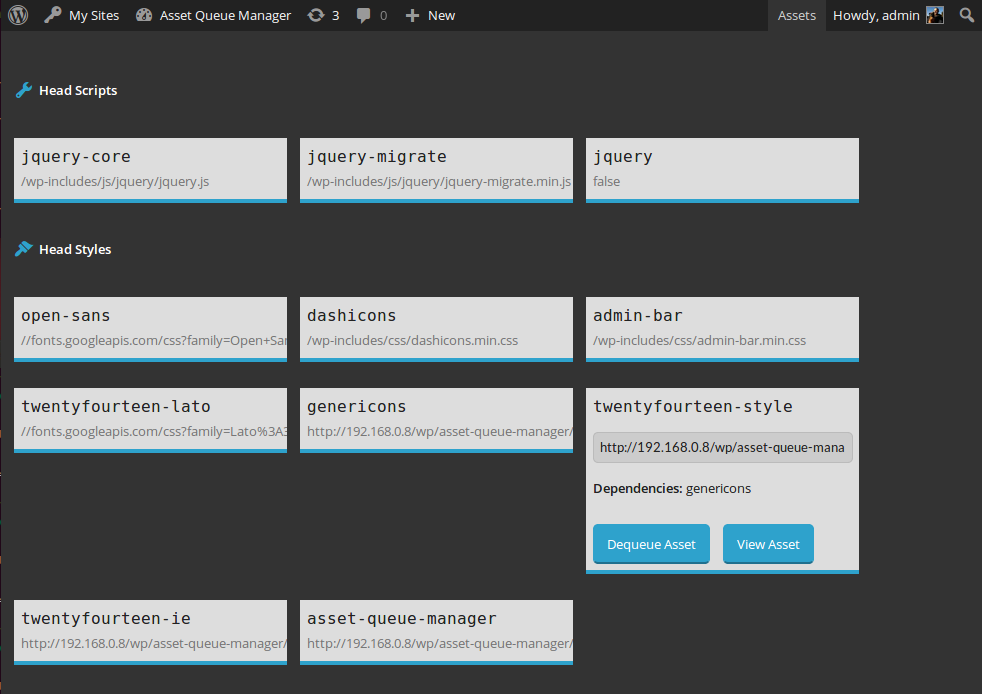
If you want to deregister with plugin use Asset Queue Manager
Open preferences by pressing Command + ","
And paste the following snippet
"file_exclude_patterns":
	[
		"*.svn",
		"*.git",
		"*.hg",
		"CVS",
		"*tmp/cache",
		"*._*",
		"*.DS_Store"
	],
	"folder_exclude_patterns":
	[
		".sass-cache",
		".svn",
		".git"
	],
	"font_size": 14.0,
	"ignored_packages":
	[
		"Vintage"
	]
Taken from: https://gist.github.com/supawaza/8009192
<?php
	$categories = get_the_category();
		if($categories){
			echo '<div>';
			foreach($categories as $category) {
			echo '<span>' . $category->cat_name . '</span>';
		}
	echo '</div>';
}

?>
If you need just parent cagetory
<?php
  $perma_cat = get_post_meta($post->ID , '_category_permalink', true);
  if ( $perma_cat != null ) {
    $cat_id = $perma_cat['category'];
    $category = get_category($cat_id);
  } else {
    $categories = get_the_category();
    $category = $categories[0];
  }
  $category_link = get_category_link($category);
  $category_name = $category->name;
?>
<a href="<?php echo $category_link ?>"><?php echo $category_name ?></a>
<?php
global $post;
$terms = get_the_terms( $post->ID, 'projekte_cat' );
foreach ($terms as $term) {
$term_id = $term->term_id;
$term_name = get_term( $term_id )->name;
$term_slug = get_term( $term_id )->slug;
echo '<div class="'.$term_slug.'">'. $term_name . '</div>';
}
?>Replace "projeckte_cat" with your taxonomy slug.
<?php
function search_excerpt_highlight() {
    $excerpt = get_the_excerpt();
    $keys = implode('|', explode(' ', get_search_query()));
    $excerpt = preg_replace('/(' . $keys .')/iu', '<strong class="search-highlight">\0</strong>', $excerpt);

    echo '<p>' . $excerpt . '</p>';
}

function search_title_highlight() {
    $title = get_the_title();
    $keys = implode('|', explode(' ', get_search_query()));
    $title = preg_replace('/(' . $keys .')/iu', '<strong class="search-highlight">\0</strong>', $title);

    echo $title;
}
?><?php
$search_query = get_search_query();
// WP_Query arguments
$args = array(
'post_type' => array( 'post', 'gesamtprojekt', 'startseite', 'teilprojekte', 'umwelt', 'service' ),
's' => $search_query,
);
// The Query
$query = new WP_Query( $args );
// The Loop
if ( $query->have_posts() ) {
while ( $query->have_posts() ) {
$query->the_post();
// do something
?>
<div class="search-link">
<h2><?php search_title_highlight(); ?></h2>
<?php search_excerpt_highlight(); ?>
<a href="<?php the_permalink(); ?>" >Seite aufrufen</a>
</div>
<?php
}
} else {
echo '<h2>Nichts gefunden für: '.$search_query.'</h2>';
}
// Restore original Post Data
wp_reset_postdata();
?>.search-highlight {
background:#FFFF00;
}Result

function goBack() {
  window.history.back();
}
<button onclick="goBack()">Go Back</button>This code will lead you to the page same as you pressed back in Browser
This is done with event listener.
It will track class ".show-on-scroll" and add and remove Class "is-visible" depending on if it's visible in screen view or not.
(function($){	$(function() {

    /*======================================================
    =            Detect request animation frame            =
    ======================================================*/
	var scroll = window.requestAnimationFrame ||
	             // IE Fallback
	             function(callback){ window.setTimeout(callback, 1000/60)};
	var elementsToShow = document.querySelectorAll('.show-on-scroll');

	function loop() {

	    Array.prototype.forEach.call(elementsToShow, function(element){
	      if (isElementInViewport(element)) {
	        element.classList.add('is-visible');
	      } else {
	        element.classList.remove('is-visible');
	      }
	    });

	    scroll(loop);
	}

	// Call the loop for the first time
	loop();

	// Helper function from: http://stackoverflow.com/a/7557433/274826
	function isElementInViewport(el) {
	  // special bonus for those using jQuery
	  if (typeof jQuery === "function" && el instanceof jQuery) {
	    el = el[0];
	  }
	  var rect = el.getBoundingClientRect();
	  return (
	    (rect.top <= 0
	      && rect.bottom >= 0)
	    ||
	    (rect.bottom >= (window.innerHeight || document.documentElement.clientHeight) &&
	      rect.top <= (window.innerHeight || document.documentElement.clientHeight))
	    ||
	    (rect.top >= 0 &&
	      rect.bottom <= (window.innerHeight || document.documentElement.clientHeight))
	  );
	}

}); 	})(jQuery);
List of categories for posts with link to archive and wrapped in classes
<ul>
    <?php wp_list_categories( array(
        'orderby'    => 'name',
  		'title_li' => '',
        'hide_title_if_empty' => true,
    ) ); ?>
</ul>
To enable it for taxonomies add this line and replace 'produckte' with your taxonomy slug
'taxonomy' => 'produkte',And on the end you will get this for custom categories ( taxonomies)
<ul>
    <?php wp_list_categories( array(
		'taxonomy'  => 'produkte',
        'orderby'    => 'name',
  		'title_li' => '',
        'hide_title_if_empty' => true,
    ) ); ?>
</ul><ul>
<li class="cat-item cat-item-1 current-cat">
<a aria-current="page" href="link">Cat name 1</a>
</li>
<li class="cat-item cat-item-2">
<a aria-current="page" href="link">Cat name 2</a>
</li>
<li class="cat-item cat-item-3">
<a aria-current="page" href="link">Cat name 3</a>
</li>
</ul>jQuery Snipped for toggle text inside div on click.
"Hello World" will be default text and text for every second click.
And "Bye!" will be on first and every even click.
jQuery.fn.extend({
    toggleText: function (a, b){
        var isClicked = false;
        var that = this;
        this.click(function (){
            if (isClicked) { that.text(a); isClicked = false; }
            else { that.text(b); isClicked = true; }
        });
        return this;
    }
});

jQuery('.toggle-text').toggleText("Hello World", "Bye!");The trigger is class on the object that will start the animation. Assign the class to the object that should be animated and replace 300 (milliseconds) to what you prefer
$( ".trigger" ).click(function() {
	$( ".toggled-object" ).slideToggle(300);
});
Wrap this with document ready code.
(function($){

    $(function() {

	// Your custom code here

    });

})(jQuery);(function($){
$(function() {
$( ".trigger" ).click(function() {
$( ".toggled-object" ).slideToggle(300);
});
});
})(jQuery);This code is basic and for beginners.
Usually, you can see solutions but not how to wrap jQuery code to start writing it for WordPress or Oxygen
jQuery(document).ready(function($){
// YOur code goes here


});
The outer Javascript function is known as an anonymous function and jQuery is wrapped at the end, so is therefore aliased or bound to the $ selector, so in the inner function the jQuery shorthand document does not need to be aliased.
Code was taken from wpbeaches.com
Big thanks to Sridhar Katakam and Supa Mike
Version bellow was giving me error in a couple of occasions
(function($){

    $(function() {

	// Code goes here

    });

})(jQuery);In VIA GO (now known as Studio Standard) we are using iOS and tvOS default typography as it's recommended by Apple, now users can use text size change option for better readability.
That's why templates and tutorials are for Native text sizes.
To start the tutorial you can download the iOS or tvOS template listed below, or you can create your own set that you're more familiar to work with. A possible reason to do this is maybe you need just web or Android platforms.
Text sizes in sketch templeate are copied as reference from apple iOS Typography user interface link.
To start with Sketch file, first copy the alignments you need (Left, Center, Right) and then to that group you can copy the number of colours you have.
Tip: Use Rename it plugin so you can save a lot of time.
My personal approcs is: Text size name / Alignment / Colour ( example: Title 1 / Left / Blue Colour ).
After you created and renamed all the text layers select them all and use Styles Generator to generate all the styles from the layer names of selected layers. Do not forget to use " / " in names so you group styles.
With plugin Shared Text Styles you can easily export and import text styles. This process is little manual but it is the best practice for now.
Store it on a shared Drive next to the Sketch file so others don't have a problem finding it. If you update some text styles export it once again and notify the others to import it once again.
After a new import is done it will update all text layers in the file automatically.

iOS Typography
tvOS Typography
Do not worry let’s schedule a meeting or friendly chat and see.